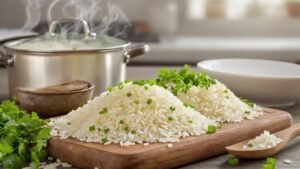
You’ve got a rice cooker, but are you making the most of it? Don’t let it gather dust in your kitchen cupboard! It’s time to unlock its full potential.
Take a journey with us as we reveal the secrets to perfectly simmered grains. You’ll discover the right water-to-grain ratio, advanced settings, and special techniques.
So, dig in, and let’s transform your ordinary rice cooker meals into extraordinary culinary experiences.
Table of Contents
ToggleMastering the Basics of Rice Cookers
In mastering the basics of rice cookers, you’ll find that the right techniques can transform your grain-simmering process into a culinary art. You see, these kitchen devices aren’t as straightforward as they seem. There’s a science behind them, and by understanding this, you can elevate your rice dishes to a whole new level.
First, let’s discuss water ratios. Too often, people rely on guesswork, but precision is key. A good rule of thumb? For every cup of rice, you’ll need 1.5 to 2 cups of water. It varies depending on the type of rice, so experiment to find your perfect balance.
Then there’s the soaking process. It’s a step most skip, but it’s crucial. Soaking rice for 30 minutes before cooking makes it fluffier and helps it cook evenly.
Lastly, don’t rush the resting period. After cooking, let your rice sit for about 10 minutes. This allows it to absorb the remaining moisture, resulting in a better texture.
Optimal Water-to-Grain Ratio
For your grains to simmer to perfection, you’ll need to nail down the optimal water-to-grain ratio. This ratio is crucial as it determines the texture and taste of your grain. Too little water and your grains will turn out hard and undercooked. Too much water and you’ll end up with a mushy, overcooked mess.

To visualize this, let’s consider a step-by-step process:
- Step 1: Measuring your grain.
- Imagine you’re using a cup to measure out your grains. You’ll pour these into your cooking pot, each grain falling individually, creating a symphony of tiny sounds as they collide.
- Step 2: Adding water
- Now, you’ll add water. For most grains, the ratio is 2:1 — two parts water to one part grain. Visualize filling up two of those same cups with water and pouring it over the grains, watching as they’re gently submerged.
Advanced Rice Cooker Settings
So, how can you leverage these precise water-to-grain ratios with the advanced settings on your rice cooker? It’s not as complex as you may think. You’ve just got to familiarize yourself with your rice cooker’s settings, which can drastically improve your grain-cooking game.
Let’s break it down. Some advanced rice cookers come with functions like ‘Quick Cook’, ‘Mixed’, and ‘Sushi’. The ‘Quick Cook’ feature reduces cooking time, but it may result in slightly firmer grains. ‘Mixed’ is typically used for rice with added ingredients, adjusting the cooking time accordingly. The ‘Sushi’ setting, on the other hand, is designed to make rice that’s slightly harder in the center, perfect for sushi rolls.
Here’s a simple guide:
| Setting | Function | Best for |
|---|---|---|
| Quick Cook | Reduces cooking time | When you’re in a hurry |
| Mixed | Adjusts cooking time based on added ingredients | Rice with vegetables or protein |
| Sushi | Cooks rice slightly harder in center | Making sushi rolls |
Specialty Grain Techniques
Often, you’ll find that different grains require unique cooking techniques to truly shine. Each grain has its own personality, and understanding these traits can unlock a whole new realm of flavor and texture.
Let’s delve into two specialty grains: quinoa and barley.
- Quinoa
- You’ll want to rinse quinoa thoroughly before cooking to remove any residual saponins, which can give it a bitter taste. Then, simmer it in a 2:1 ratio of water to grain until the grains become translucent and the germ forms a visible spiral.
- Quinoa can also be toasted in a dry skillet before simmering to bring out a nutty flavor.
- Barley
- Before cooking, soak barley in water for several hours or overnight. This reduces cooking time and makes it easier to digest.
- When it’s time to cook, use a 2.5:1 ratio of water to grain. You can also add a pinch of salt or a splash of oil for extra flavor.
These techniques aren’t just for the kitchen-savvy. They’re for anyone who’s ready to explore the full potential of grains. With a little practice, you’ll be simmering grains like a pro in no time.
Perfecting the Simmering Process
Once you’ve mastered these specialty grain techniques, it’s time to perfect your simmering process. This step is vital as it’s here that your grains absorb flavor and achieve their ideal texture.
Begin by bringing your liquid, whether it’s water, broth, or wine, to a rolling boil. Once it’s bubbling, you can add your grains. It’s crucial to stir immediately after adding them to prevent any sticking or clumping.
Now comes the key part: adjusting the heat. You should reduce it to the point where it maintains a gentle simmer. This ensures your grains cook evenly without becoming mushy. Don’t rush it; good simmering demands patience.
Cover your pot, but remember to stir occasionally. This helps to release the grains’ natural starches, enhancing their creaminess.
Keep an eye on your grains. They should absorb most of the liquid and double in size. You’re aiming for a tender, but slightly chewy texture. If they’re still hard, don’t hesitate to add more liquid and continue simmering.
Perfecting the simmering process requires practice, but once you’ve nailed it, you’ll unlock a whole new level of grain-based dishes. Your cooking will be transformed, showcasing your grains in their full, glorious potential.


