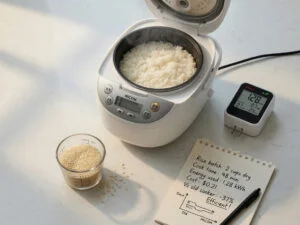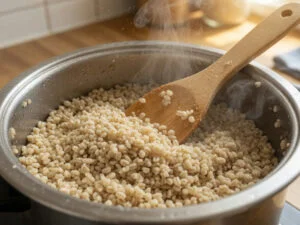
Yes, you can absolutely cook pearled barley in a rice cooker — and it might be the easiest method you’ll ever try. The magic ratio is 1 cup of pearled barley to 2.5 cups of water. Select your Brown Rice or Whole Grain setting, press start, and walk away. Your rice cooker does the rest.
Barley on the stovetop means standing over a bubbling pot for 40-plus minutes, adjusting the heat, and hoping it doesn’t boil over. In a rice cooker? You set it and forget it. Whether you’re making a hearty soup, a weekday grain bowl, or a simple side dish, this guide covers everything — ratios, settings, cook times, troubleshooting, and flavor ideas — so you get perfect results every single time.
Quick Summary
- The ideal barley-to-water ratio in a rice cooker is 1:2.5 (1 cup barley, 2.5 cups water or broth)
- Use the Brown Rice, Whole Grain, or Multi-Grain setting for best results
- Cook time is roughly 40–55 minutes, depending on your machine
- Soaking for 30 minutes is optional but shortens the cook time and improves texture
- One cup of dry barley yields about 3 cups cooked — enough for 4 generous servings
What Is Pearled Barley and Why Is It Perfect for a Rice Cooker?
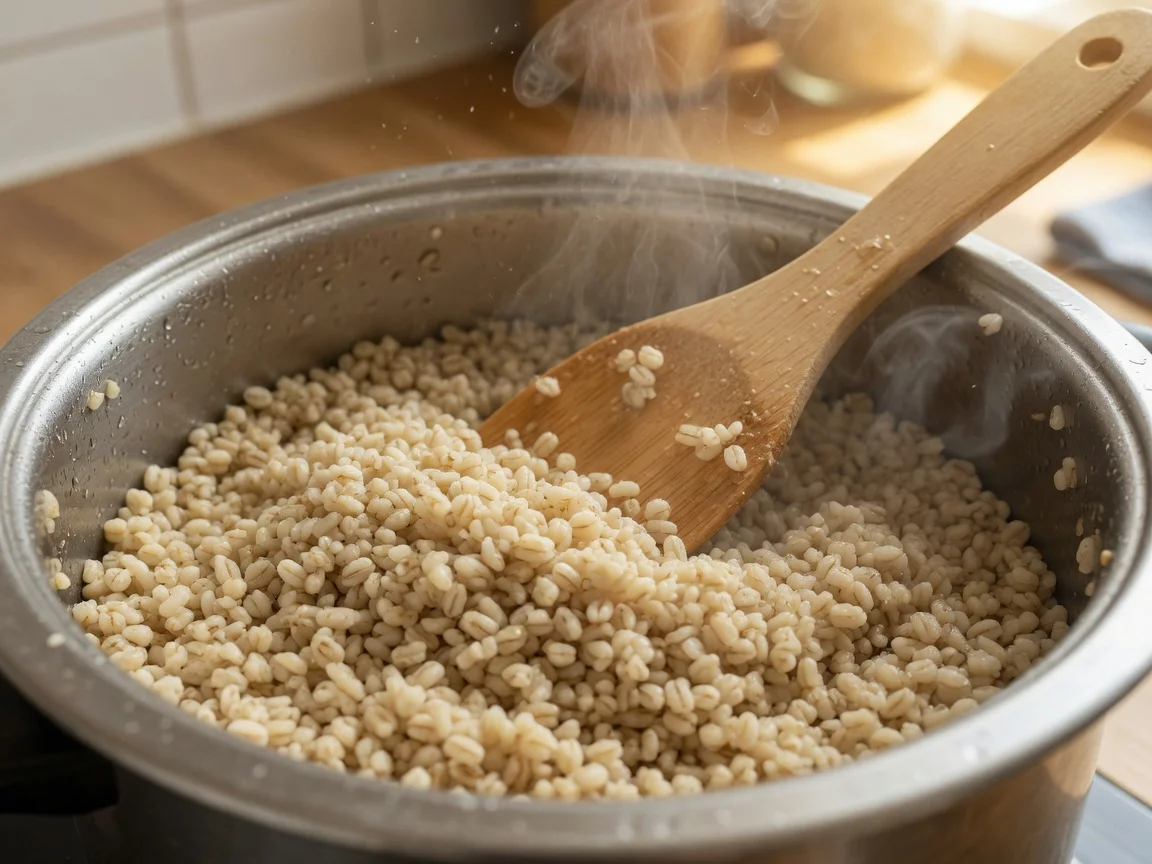
Pearled barley is barley that’s had its tough outer hull and bran layer removed through a process called pearling. The result is a smooth, ivory-colored grain that cooks faster and yields a softer, slightly creamy texture compared to hulled (whole grain) barley. It’s one of humanity’s oldest cultivated grains, with evidence of cultivation stretching back more than 10,000 years — though it’s just as relevant in a modern kitchen as it was in ancient ones.
From a nutrition standpoint, pearled barley still delivers. A single cooked cup provides roughly 6 grams of dietary fiber — much of it beta-glucan, a soluble fiber well recognized for supporting cardiovascular health and blood sugar balance. It also provides around 4 grams of protein per cup, along with meaningful amounts of magnesium, selenium, and manganese. For a grain that costs very little and cooks mostly unattended, that’s a serious nutritional return on investment.
So why use a rice cooker specifically? Because pearled barley needs slow, even, sustained heat to open up and become tender without the outside turning mushy before the center cooks through. That’s precisely what a rice cooker delivers. The sealed lid traps steam, the thermal sensor regulates the temperature automatically, and the keep-warm function holds your grains at the ideal temperature once cooking finishes. No guesswork, no burnt bottoms, no babysitting.
What’s the Right Water-to-Barley Ratio for a Rice Cooker?
Getting the ratio right is the single most important step when cooking pearled barley in a rice cooker. Use too little water and you’ll end up with crunchy, undercooked grains. Too much and you get a mushy, waterlogged porridge — unless that’s what you’re going for.
The sweet spot is 1 cup of dry pearled barley to 2.5 cups of water or broth. This is noticeably more liquid than you’d use for white rice (typically a 1:1.5 ratio) because barley absorbs significantly more moisture as it swells during cooking. Skimping on water is the number-one reason first-timers end up with undercooked results.
| Dry Pearled Barley | Water / Broth | Cooked Yield | Servings |
|---|---|---|---|
| ½ cup | 1¼ cups | ~1½ cups | 2 |
| 1 cup | 2½ cups | ~3 cups | 4 |
| 1½ cups | 3¾ cups | ~4½ cups | 6 |
| 2 cups | 5 cups | ~6 cups | 8 |
One important tip: if your rice cooker has measurement lines on the inside of the bowl, don’t rely on those for barley — they’re calibrated for rice. Measure your barley and water separately using standard measuring cups before adding them to the pot. That small habit eliminates a surprising number of problems.
Using broth instead of plain water is also worth mentioning here. Chicken broth, vegetable broth, or mushroom stock all add depth and flavor without any extra effort. If you plan to use your cooked barley in soups or grain bowls, swapping water for broth is one of those simple moves that makes a noticeably big difference in the final dish.
Which Rice Cooker Setting Should You Use for Pearled Barley?
Your best option is the Brown Rice or Whole Grain setting — whichever your rice cooker offers. These settings run at a slightly lower temperature for a longer period of time, which gives barley the extended cook window it needs to fully hydrate and become tender without the exterior getting mushy before the center finishes.
If your machine doesn’t have either of those options, the standard White Rice setting works as a backup, though you may need to run a second cycle to get barley all the way through. Some users also report excellent results with the Mixed Rice or Multi-Grain setting, if their model has one. It’s worth experimenting — most mid-range and high-end machines have at least one setting that handles denser grains reliably.
Owners of induction heating (IH) rice cookers tend to see the most consistent barley results because these machines fine-tune temperature throughout the entire cook cycle, rather than relying on a single fixed thermostat. If you want to understand exactly what your specific machine is capable of, exploring your induction rice cooker’s advanced features can open up a lot of cooking possibilities well beyond plain white rice.
Here’s a quick setting guide by cooker type:
- Basic on/off rice cooker: Default Cook setting; run a second cycle if barley is still firm
- Fuzzy logic cooker: Brown Rice or Whole Grain setting; usually one cycle is enough
- IH rice cooker: Whole Grain or Multi-Grain setting; consistently excellent results
- Multi-cooker: Slow Cook or Rice/Grain mode, depending on brand
How Long Does Pearled Barley Take in a Rice Cooker?
Expect 40 to 55 minutes of active cooking time for most machines. Some high-end IH models finish closer to 35 minutes, while basic on/off cookers may switch to Keep Warm before the barley is done — requiring a second full cycle that brings total time to around 70 minutes.
Once the cook cycle ends, don’t rush to open the lid. Let the barley rest on the Keep Warm setting for at least 10 minutes. That resting period lets residual steam finish the job and gives you noticeably fluffier, more evenly cooked grains. Think of it the same way you’d rest a roast before slicing — it genuinely matters. If you’ve ever wondered exactly what happens during that hold period, this overview of what your rice cooker’s automatic keep-warm function actually does is worth a read.
- Basic cooker (White Rice setting): 45–55 min, may need a second cycle
- Fuzzy logic (Brown Rice setting): 45–55 min, typically one cycle
- IH cooker (Whole Grain setting): 35–45 min
- Always add 10 min rest time on Keep Warm after any cycle
Do You Need to Soak Pearled Barley Before Cooking It?
No — soaking is completely optional. Dry pearled barley cooked at a 1:2.5 ratio on the Brown Rice setting will turn out perfectly tender without any pre-soaking. But if you have 30 minutes to spare, soaking pays dividends in two ways: it shortens the active cook time by roughly 10–15 minutes, and it tends to produce a slightly more even, plump texture throughout the grain.
If you do soak, drain the barley completely and start fresh with your measured cooking water. Don’t cook in the soaking liquid — it can make the barley gummy and affect the overall texture. A quick rinse after soaking and draining is all you need before the grains go into the cooker.
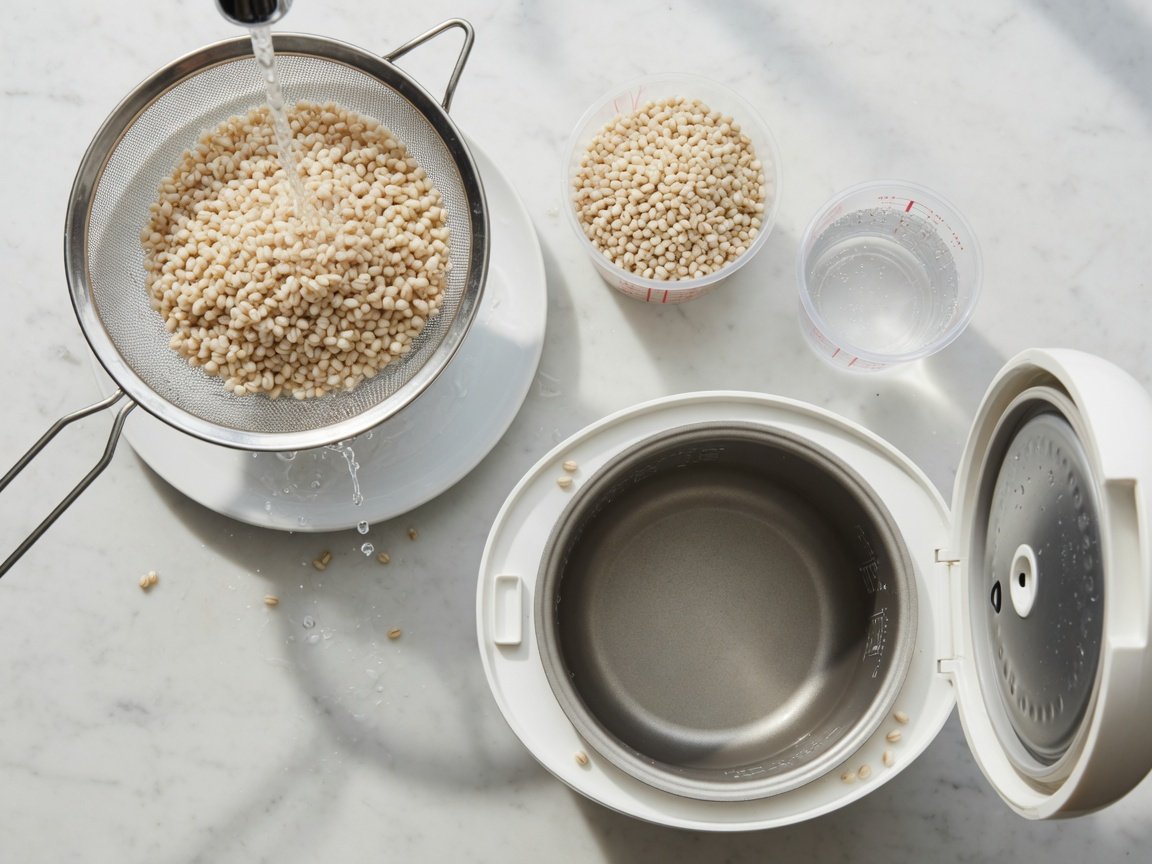
Regardless of whether you soak or not, rinsing dry pearled barley under cold water for about 30 seconds before cooking is always a good idea. It removes excess surface starch that causes clumping, and it noticeably reduces foaming during the cook cycle — which becomes important when we get to the overflow section below.
Step-by-Step: How to Cook Pearled Barley in a Rice Cooker
Here’s the complete process from start to finish. This works for any rice cooker, from a basic $20 model to a high-end Zojirushi or Cuckoo.
- Measure your barley. Use standard dry measuring cups, not the plastic cup that came with your rice cooker — those are typically 180ml, not the standard 240ml cup.
- Rinse under cold water. Place barley in a fine mesh strainer and rinse for 30 seconds. Drain well.
- Optional soak. Cover with cold water and soak for 30 minutes if time allows. Drain and rinse again before cooking.
- Add to the rice cooker bowl. Pour in the rinsed barley first, then add your water or broth at the 1:2.5 ratio.
- Season if desired. Add a pinch of salt, a bay leaf, or half a teaspoon of olive oil to reduce foaming. Stir briefly.
- Select your setting. Choose Brown Rice, Whole Grain, or Multi-Grain. If those aren’t available, use White Rice.
- Press Cook and walk away. Do not open the lid during cooking — every peek releases steam and disrupts the cook cycle.
- Rest on Keep Warm. When the cycle ends, leave the lid closed on Keep Warm for 10 minutes.
- Fluff and serve. Use a rice paddle or fork to gently fluff the barley. Taste and adjust seasoning before serving.
Genuinely, that’s it. Nine steps with less than 5 minutes of hands-on time. The rice cooker handles the other 40–55 minutes entirely on its own.
Why Is My Barley Overflowing the Rice Cooker?
This is one of the most common surprises when cooking barley in a rice cooker, and it catches a lot of first-timers off guard. Barley releases significantly more starchy foam during cooking than white rice does — and that foam can bubble up, clog the steam vent, and cause the cooker to boil over before the cycle finishes.
The fix is usually simple: rinse your barley thoroughly before cooking, and don’t fill the cooker past the halfway mark. Because barley swells to roughly three times its dry volume, overcrowding the pot is easy to do accidentally. Stick to no more than 1–1.5 cups of dry barley at a time unless you’re working with a large 10-cup-plus machine.
Adding a small amount of fat — half a teaspoon of butter or olive oil — to the cooking water also helps suppress foam and significantly reduces overflow risk. Barley is one of the most frequent culprits behind rice cooker overflow problems, and the solutions for it are the same as for other starchy grains. If you find your machine is prone to boiling over with barley or any other grain, there’s a great rundown of common rice cooker overflow and steam vent issues that covers the most effective fixes.
How to Season and Flavor Barley Cooked in a Rice Cooker
Plain barley has a mild, slightly nutty flavor — which makes it one of the most versatile grain bases you can cook. The easiest upgrade is swapping water for broth. Beyond that, you can add flavor in two ways: stir seasonings into the cooking liquid before the cycle starts, or toss the finished grains with dressings and toppings once cooking is done.
Add before cooking:
- A bay leaf or two (remove before serving)
- Whole peppercorns or a pinch of red pepper flakes
- Dried thyme, rosemary, or Italian seasoning blend
- A splash of soy sauce or tamari for savory depth
- Half a teaspoon of garlic powder or onion powder
Toss in after cooking:
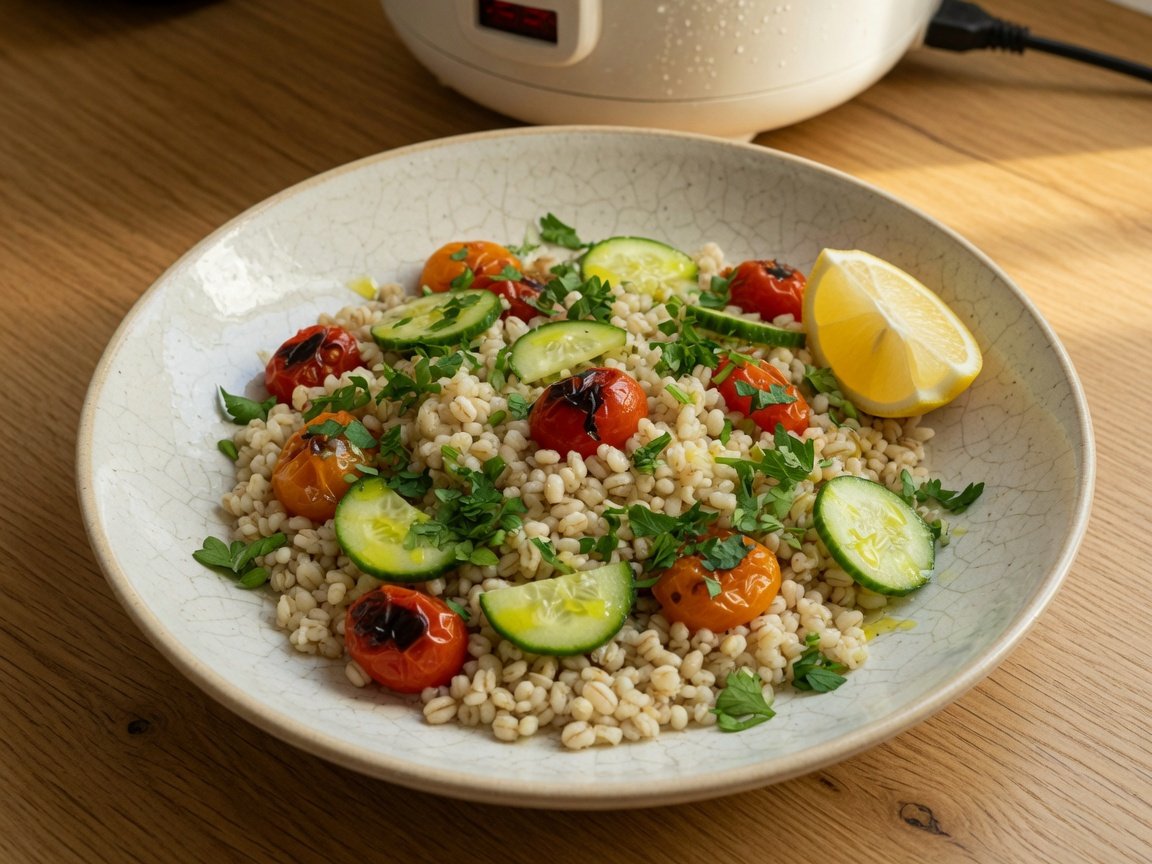
- Lemon juice and olive oil for a bright grain salad base
- Fresh herbs — parsley, basil, chives, or dill all work beautifully
- Toasted nuts or seeds for crunch and contrast
- Grated Parmesan and a pat of butter for a risotto-style side
- Roasted vegetables and a tahini drizzle for a satisfying grain bowl
If your rice cooker came with a steaming tray, you can actually cook vegetables at the same time as your barley — the steam rising from the grains below does all the work. Broccoli, green beans, sliced zucchini, and carrots all steam perfectly in about the same window as a barley cook cycle. If you haven’t tapped into this yet, the guide on maximizing rice cooker steaming features shows exactly how to turn a single cook cycle into a full, balanced meal.
What Can You Make With Rice Cooker Barley?
Once you’ve got a batch of cooked barley on hand, the possibilities are wide and practical. Here are the most useful ways to put it to work:
Barley Soup: This is the most classic use case, and for good reason. Cooked barley thickens soups beautifully and holds its texture for days in the fridge — it doesn’t go soggy or disintegrate the way pasta or rice can. If your machine has a dedicated soup setting, you can build an entire barley soup in one pot: start with aromatics, add broth, barley, and vegetables, and let the cooker do its thing. The rundown of the best rice cooker settings for making soups covers which modes work best for this approach.
Grain Bowls: Barley makes an excellent grain bowl base. It’s sturdy enough to hold up under roasted vegetables, proteins, and sauces without going limp, and it keeps well in the fridge for 4–5 days. Cook a large batch on Sunday and you’ve got ready-made foundations for weekday lunches all week long.
Barley Risotto (Orzotto): Italian cooks have long prepared “orzotto” — a risotto-style dish using barley instead of Arborio rice. The natural starchiness of barley produces a similarly rich, creamy consistency, and a rice cooker handles the entire process completely hands-free.
Stuffed Peppers and Wraps: Use cooked barley as a filling mixed with canned beans, shredded cheese, and spices. It holds together well, adds chew, and makes any stuffed dish more filling and nutritious.
Breakfast Porridge: Cook barley at a 1:3 ratio (more water than the standard method) for a thick porridge consistency. Top with honey, fresh fruit, and a spoonful of yogurt for a fiber-rich breakfast that keeps you full for hours.
How to Store and Reheat Leftover Barley
Cooked barley keeps well in the refrigerator for up to 5 days stored in an airtight container. It also freezes beautifully — portion it into zip-lock bags or freezer-safe containers and it’ll last up to 3 months. This makes batch cooking barley on a weekend afternoon one of the smartest meal-prep moves you can make.
To reheat from the fridge: add a splash of water or broth (about 2 tablespoons per cup of barley) and microwave covered for 1–2 minutes, stirring halfway through. Alternatively, warm it in a small saucepan over low heat with a little liquid added. Barley firms up noticeably in the refrigerator, so that extra liquid is essential for restoring the right texture.
To reheat from frozen: thaw overnight in the refrigerator, then follow the same method above. If you’re in a hurry, microwave straight from frozen at 50% power for 3–4 minutes, stirring once halfway through.
Pearled Barley vs. Hulled Barley: Does It Matter for Your Rice Cooker?
Yes — quite a bit, actually. While both are forms of the same grain, they behave very differently inside a rice cooker. Understanding the distinction will save you a lot of frustration if you accidentally grab hulled barley at the store.
| Feature | Pearled Barley | Hulled Barley |
|---|---|---|
| Processing | Hull and bran removed | Only outer hull removed |
| Fiber per cooked cup | ~6g (moderate) | ~8g (higher, more beta-glucan) |
| Cook time (rice cooker) | 40–55 min | 60–80 min |
| Water ratio | 1:2.5 | 1:3 or more |
| Best setting | Brown Rice or Whole Grain | Whole Grain; may need 2 cycles |
| Texture when cooked | Soft, slightly creamy | Chewier, more toothsome |
| Soaking recommended? | Optional | Yes — 8+ hours strongly recommended |
For most rice cookers — especially basic or mid-range models — pearled barley is the practical, reliable choice. It cooks consistently within a single cycle and produces predictable results without extended soaking. Hulled barley is nutritionally superior because its bran layer remains intact, but it requires significantly more time and water. Many standard rice cookers struggle to cook it all the way through in a single cycle.
If you’re committed to cooking hulled barley in your rice cooker, soak it for at least 8 hours (overnight is ideal), use a 1:3 water ratio, and plan for two full cook cycles with a rest period in between. Machines with a dedicated multi-grain or whole grain mode handle this task much more reliably. This is also a good moment to think about whether you’re getting the most out of your rice cooker’s feature set — modern machines have settings specifically designed for exactly this kind of dense grain cooking.
Frequently Asked Questions About Cooking Pearled Barley in a Rice Cooker
Can I cook pearled barley in a rice cooker without soaking it first?
Yes, absolutely. Soaking is optional, not required. Dry pearled barley cooked at a 1:2.5 ratio on the Brown Rice setting will turn out perfectly tender without any pre-soaking. Soaking just cuts roughly 10–15 minutes off the cooking time and can produce slightly more even texture throughout. If you’re in a hurry, skip it entirely — you’ll still get excellent results.
Why is my barley still crunchy after a full cook cycle?
Most likely, you either used too little water or the cooking setting wasn’t quite right for a dense grain like barley. First, double-check your ratio — you should be using 2.5 cups of water for every 1 cup of dry barley. If the ratio was correct, the fix is simple: add an extra ¼ to ½ cup of water to the pot and run a second cook cycle without stirring. That usually finishes the job completely.
Can I cook pearled barley and white rice together in a rice cooker?
It’s possible, but tricky — the two grains have different cook times and water requirements, so balancing them in the same pot takes some adjustment. If you want to try it, use a 50/50 mix of white rice and pearled barley with a 1:2 combined water ratio, and select the Brown Rice setting. The rice may finish a little softer than usual while the barley catches up, but many people enjoy the mixed texture. Soaking the barley portion beforehand helps close the cook-time gap.
How much does 1 cup of dry pearled barley make when cooked?
One cup of dry pearled barley yields approximately 3 cups of cooked barley — a three-fold increase in volume. This makes barley one of the most economical grains you can work with. A single cup of dry barley, which costs very little, is enough to serve 3–4 people as a generous side dish.
Is pearled barley gluten-free?
No. Barley contains gluten and is not safe for anyone with celiac disease or non-celiac gluten sensitivity. If you need a gluten-free grain with a similar texture and cooking profile, brown rice, sorghum, or millet are all solid alternatives that cook well using similar rice cooker methods.
My rice cooker keeps switching to Keep Warm before the barley is fully cooked. What do I do?
This is a common issue with basic on/off rice cookers that use a simple thermal sensor — once all the free water is absorbed and the pot temperature climbs above boiling point, the machine automatically drops to Keep Warm, even if the barley isn’t tender yet. The fix: as soon as it switches to Keep Warm, open the lid, add 2–3 tablespoons of water to the pot without stirring, close the lid, and manually restart the cook cycle. Repeat if needed. Upgrading to a fuzzy logic or IH cooker eliminates this issue entirely, as those machines monitor grain doneness rather than simply waiting for the water to disappear.
Can I use the delay timer to start my barley while I’m at work?
Technically yes, if your machine has a delay start function. However, leaving uncooked grain sitting in water for extended periods before cooking begins poses a food safety risk, particularly in a warm kitchen environment. If you want to use the timer, start with dry rinsed barley (don’t pre-soak it), keep the delay to under 8 hours, and make sure your kitchen stays reasonably cool. It’s a useful feature for planning ahead — and if you’re curious about how the delay function works in practice, there’s a detailed look at what a rice cooker’s delay start feature actually does that’s worth checking before you rely on it for something as absorbent as barley.
—